A little background.
 Recently I was working on a Salesforce app that interacts with a third party api. In our case, users utilize Salesforce to sell complex digital products served by a remote fulfillment platform. Unfortunately, the remote API wasn’t designed with Salesforce in mind. As a result simple-sounding business processes required multiple api calls. The sheer number of calls needed made direct callouts impractical. To overcome this we built a middleware application hosted on Heroku. We intentionally architected our middleware so a single Salesforce callout could trigger the process. In response to the callout, our middleware application uses the rest API to call back into Salesforce and gather all the needed data. Then it makes API calls as needed to push that data to the client’s proprietary fulfillment platform. To ensure the Salesforce user isn’t waiting for a page to load the middleware app works Asynchronously. Unfortunately, this also complicates success and failure messaging to the Salesforce user. This is where the Streaming API comes into play. Using the streaming API we can show realtime success and error notifications from our Middleware to the Salesforce user.
Enter the Streaming API.
If you’re not familiar with it, Salesforce introduced the streaming API a few releases ago and is one of the most powerful additions to the Salesforce platform. Here’s how it works: As a developer, you establish a “Push Topic”. PushTopics take the form of a PushTopic object record. PushTopic records have a few key fields; namely:
- Query, which holds a string representation of a Soql query
- notifyForOperationCreate, if true insert dml calls will trigger a push event
- notifyForOperationUpdate, if true update dml calls will trigger a push event
- notifyForOperationDelete, if true delete dml calls will trigger a push event
- notifyForOperationUndelete, if true undelete dml calls will trigger a push event
These fields, are all boolean fields. If set to true, any corresponding DML statement who’s data matches your query will result in the API pushing that record. For instance, if you’ve saved your push topic record with:
notifyForFieldOperationCreate=true
query='SELECT ID, Name, MailingAddress FROM Account'
Putting it all together – The middleware changes
With our Api integration example we need to make a change to our middleware to enable notifications. Likewise, inside our Salesforce app, we’ll need to do two things:
- Establish a push topic.
- Edit our Visualforce page to subscribe to the push topic and display the notifications.
Lets start with the middlware modifications. Our middleware application returns final results to Salesforce by creating Audit_Log__c records. As originally designed, it’s setup to create an audit log only at the end of the process. If we want to see immediate results, however, we’ll need to extend our middleware to create multiple Audit_Log__c records — one per step in the process. The key this integration then, is to ensure our Audit_Log__c records trigger our push topic. In our case the solution is to create new Salesforce audit logs records logging the results for each step of the process. Each of these records logs the action taken, whether it succeeded, and what, if any, error messages were returned.
VisualForce changes
With our middleware setup to log individual events, we can turn our attention back to Salesforce. First we need to establish a PushTopic record. The easiest way to create a PushTopic is to use the Developer console. Open up the dev console and then click on the Debug menu and choose “Open Anonymous Apex” window. This anonymous apex window allows us to execute small bits of code without having to generate a full class. Copy and Paste this code sample to your Anonymous Apex window:
PushTopic pushTopic = new PushTopic();
pushTopic.Name = 'ExternalAPINotifications';
pushTopic.Query = 'SELECT Id, Name, Action__c FROM API_Audit_Log__c';
pushTopic.ApiVersion = 30.0;
pushTopic.NotifyForOperationCreate = true;
pushTopic.NotifyForOperationUpdate = false;
pushTopic.NotifyForOperationUndelete = false;
pushTopic.NotifyForOperationDelete = false;
pushTopic.NotifyForFields = 'Referenced';
insert pushTopic;
Click execute, and your anonymous apex window should disappear. If you see a Success message in the log window, move on!
Within our Visualforce page, we have a bit more work to do. Essentially, we need to incorporate a few Javascript libraries and display the results. To do this, we’ll need to:
- create a Static resource bundle
- load a few javascript files on our visualforce page
- add some markup to display
- write a javascript callback
- add a filter
While Salesforce handles the work of streaming the data; to display it we’ll need to subscribe to our pushTopic. To subscribe we use the cometd javascript library. Cometd is a javascript implementation of the Bayeux protocol, which the streaming API uses. Using this library, along with jQuery and a helper library for JSON we can subscribe with a single line of code.
$.cometd.subscribe('/topic/ExternalAPINotifications', function(message) {...}
But lets not get ahead of ourselves. First, lets create a static resource. Static resources are created by uploading zip files to Salesforce. For more information on creating Static resources see this helpful document. I’ve created a helpful zipfile containing all the libraries you’ll need to use the Streaming api here: https://www.dropbox.com/s/4r6hwtr3xvpyp6z/StreamingApi.resource.zip Once you’ve uploaded that static resource, open up your Visualforce page, and add these lines at the top:
<!-- Streaming API Libraries -->
<apex:includeScript value="{!URLFOR($Resource.StreamingApi, '/cometd/jquery-1.5.1.js')}"/>
<apex:includeScript value="{!URLFOR($Resource.StreamingApi, '/cometd/cometd.js')}"/>
<apex:includeScript value="{!URLFOR($Resource.StreamingApi, '/cometd/json2.js')}"/>
<apex:includeScript value="{!URLFOR($Resource.StreamingApi, '/cometd/jquery.cometd.js')}"/>
These lines tell Visualforce to include the javascript you need on your page.
The Final Countdown!
In order for the streaming API to add HTML segments to our page whenever the API fires a PushTopic, we’ll need to put a div on our page. Where is largely up to you, but I tend to try and keep my messaging at the top of the page. This is similar with how Salesforce does their own validation messaging etc. Wherever you decide to put it, put a div tag, and give it the id of “apiMessages” Something like this will do nicely:
<div id="apiMessages"></div> <!-- This Div is for use with the streaming Api. Removing this div hurts kittens. -->
Then at the bottom of your page’s markup, find the ending </apex:page> tag. Just above that tag, place a new script tag block like this:
<script type="text/javascript">
</script>
Inside this script block, we’re going to subscribe to our pushTopic and setup how our data looks when presented. To start, lets create a jQuery on document ready handler like this:
<script type="text/javascript">
  (function($){
    $(document).ready(function() {
      // Everything is Awesome Here. Here we can do stuff. Stuff that makes our bosses go "whoa!"
    });
  })(jQuery);
</script>
All this can look a bit intimidating but code inside this block will run when the browser signals that the document is ready. It’s in here that we want to initialize our Cometd connection to the Streaming API and do something with our data. The Cometd library we’re using is implemented as a callback system, so we need to write a callback function that outputs our data to the screen. But first, let’s hook up Cometd to the Streaming API.
<script type="text/javascript">
  (function($){
    $(document).ready(function() {
      $.cometd.init({ // <-- That line invokes the cometd library.
        // This next line snags the current logged in users' server instance: ie https://na5.salesforce.com and attaches the comet endpoint to it.
        url: window.location.protocol+'//'+window.location.hostname+'/cometd/24.0/',
        // Always vigilant with security, Salesforce makes us Authenticate our cometd usage. Here we set the oAuth token! Don't forget this step!
        requestHeaders: { Authorization: 'OAuth {!$Api.Session_ID}'}
      });
    });
  })(jQuery);
</script>
A couple of important notes here. The url and request headers are identical, regardless of org. Astute observers will note that we’re letting Visualforce substitute in actual API session credentials. This means that the Streaming API is following Salesforce security. If you can’t see the streamed object normally, you won’t be able to see it here.
Once we’ve setup the connection, we can establish the subscription. As before, it’s a simple one-liner addition to our code.
<script type="text/javascript">
  (function($){
    $(document).ready(function() {
      $.cometd.init({
        url: window.location.protocol+'//'+window.location.hostname+'/cometd/24.0/',
        requestHeaders: { Authorization: 'OAuth {!$Api.Session_ID}'}
      });
      // **** this is the crucial bit that changes per use case! ****
      $.cometd.subscribe('/topic/ExternalAPINotifications', function(message) {...});
    });
  })(jQuery);
</script>
The subscribe method accepts two parameters. The first is the text representation of the stream to subscribe to. It’s always to going to start with ‘/topic/’. The second is a callback function to be executed whenever data is received. In case you’re new to the Javascript or Asynchronous development community a Callback is a method executed whenever a given event occurs, or another method completes and calls it.
In our example above, we’re creating an anonymous function that accepts a single argument – message. message is a javascript object an id available to the body of our function. Within this function you can do anything that Javascript allows, from alert(); calls to appending objects to the Dom tree. Functionally, appending elements to the dom is the most practical so lets build that out. Remeber the div we created a few steps back? The one with the Id “apiMessages”? Lets put that to work.
<script type="text/javascript">
  (function($){
    $(document).ready(function() {
      $.cometd.init({
        url: window.location.protocol+'//'+window.location.hostname+'/cometd/24.0/',
        requestHeaders: { Authorization: 'OAuth {!$Api.Session_ID}'}
      });
      $.cometd.subscribe('/topic/ExternalAPINotifications', function(message) { //<-- that function(message) bit -- it starts our callback
                $('#apiMessages').append('<p>Notification: ' +
                    'Record name: ' + JSON.stringify(message.data.sobject.Name) +
                    '<br>' + 'ID: ' + JSON.stringify(message.data.sobject.Id) +
                    '<br>' + 'Event type: ' + JSON.stringify(message.data.event.type)+
                    '<br>' + 'Created: ' + JSON.stringify(message.data.event.createdDate) +
                    '</p>');
                }); // <-- the } ends the call back, and the ); finishes the .subscribe method call.
    });
  })(jQuery);
</script>
Lets unpack that a bit. To start with, we’re invoking jQuery via $ to find the element with Id “apiMessages”. We’re asking jquery to append the following string to the apiMessages div for every record it receives. Thus, as records come in via the streaming api, a paragraph tag is added to the apiMessages div containing the text block “Record Name: name of record” <br> “Id: id of record” <br> … and so forth. It’s this append method that allows us to display the notifications that are streamed to the page.
Gotchas
At this point we have a functional streaming api implementation that will display every streaming record that matches our PushTopic. This can add a bunch of noise to the page as we probably only care about records related to the object we’re viewing. There are two ways to accomplish this kind of filtering. The first is to adjust our subscription. When we subscribe to the topic we can append a filter to our topic name like this:
$.cometd.subscribe('/topic/ExternalAPINotifications?Company=='Acme'', function(message) {...});
In this situation, only records matching the push topic criteria AND who’s company name is Acme would be streamed to our page. That said, you can filter on any field on the record. For more complex filtering, you can filter on the messages data itself. Because you’re writing the callback function you can always do nothing if you determine that the record you received isn’t one you wish to display.
Next steps, new ideas and other things you can do!
One thing we noticed after developing this is that we were left with a very large number of audit log records. In the future we may setup a “sweeper” to collect and condense the individual event audit logs into a singular audit log of a different record type when everything has gone smooth. We’ve also talked about include creating a Dashing Dashboard with live metrics from the fulfillment server. What ideas do you have? Leave a comment!
 Before Dreamforce this year, I decided I wanted to find a way to harness Passes and Beacons to meet as many of my twitter friends, fellow devs and the technologically curious as I could. In the end, I created a proximity-aware, “socially-viral” e-business card that, through the power of Passbook, alerted anyone when they came within beacon range of me.

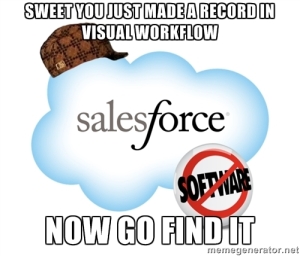 ical issue of capabilities but the lack of realization that visualflows can do that! Unfortunately, one of the technical issues that seems to come up often (at least recently) is how to create a record in a flow, and then upon successful completion of the flow, redirect the user to the new record. The use cases are pretty broad, but I was roped into the following use case. A flow is written to guide users through creating a case. When the case is created, and the flow is finished we want to redirect the users to the newly created case’s detail page. Sounds simple right?